Export Sanka records as CSV and review fields, filters, encoding, history, and reusable export templates.
Last updated: June 2, 2026
This guide explains how to export Sanka object records as CSV. Use it to choose the right records, fields, filters, encoding, history, and templates before using the file in spreadsheets, external tools, or later CSV updates.
What CSV export does
CSV export is available for the main Sanka objects, including companies, contacts, deals, items, locations, inventory, inventory transactions, quotes, orders, subscriptions, meters, invoices, payments, purchase orders, bills, disbursements, expenses, tasks, journal entries, and custom objects.Use CSV export to:
Review records currently visible in an object list
Export only the properties you need
Filter records by status, owner, date, amount, customer, or other fields
Choose an encoding such as UTF-8 or Shift-JIS
Reuse the same field set as an export template
Check export status and download files from export history
Exporting moves workspace data into an external file. Confirm personal data, financial data, contract details, and sharing rules before running the export. Depending on workspace settings, export may require approval.
Review the export with Claude / Codex first
Before exporting a large file or customer data, ask Claude or Codex connected to Sanka to review the target object, fields, filters, permissions, sharing intent, and matching key if the CSV will later be used for updates.
Sample prompt
/sanka Review this CSV export before it runs. Confirm the target object, properties to export, filter conditions, estimated record count, sensitive fields such as personal data or amounts, approval requirements, and any record ID or matching key needed if the file will later be used for CSV updates. Do not run the export yet.
Start the export
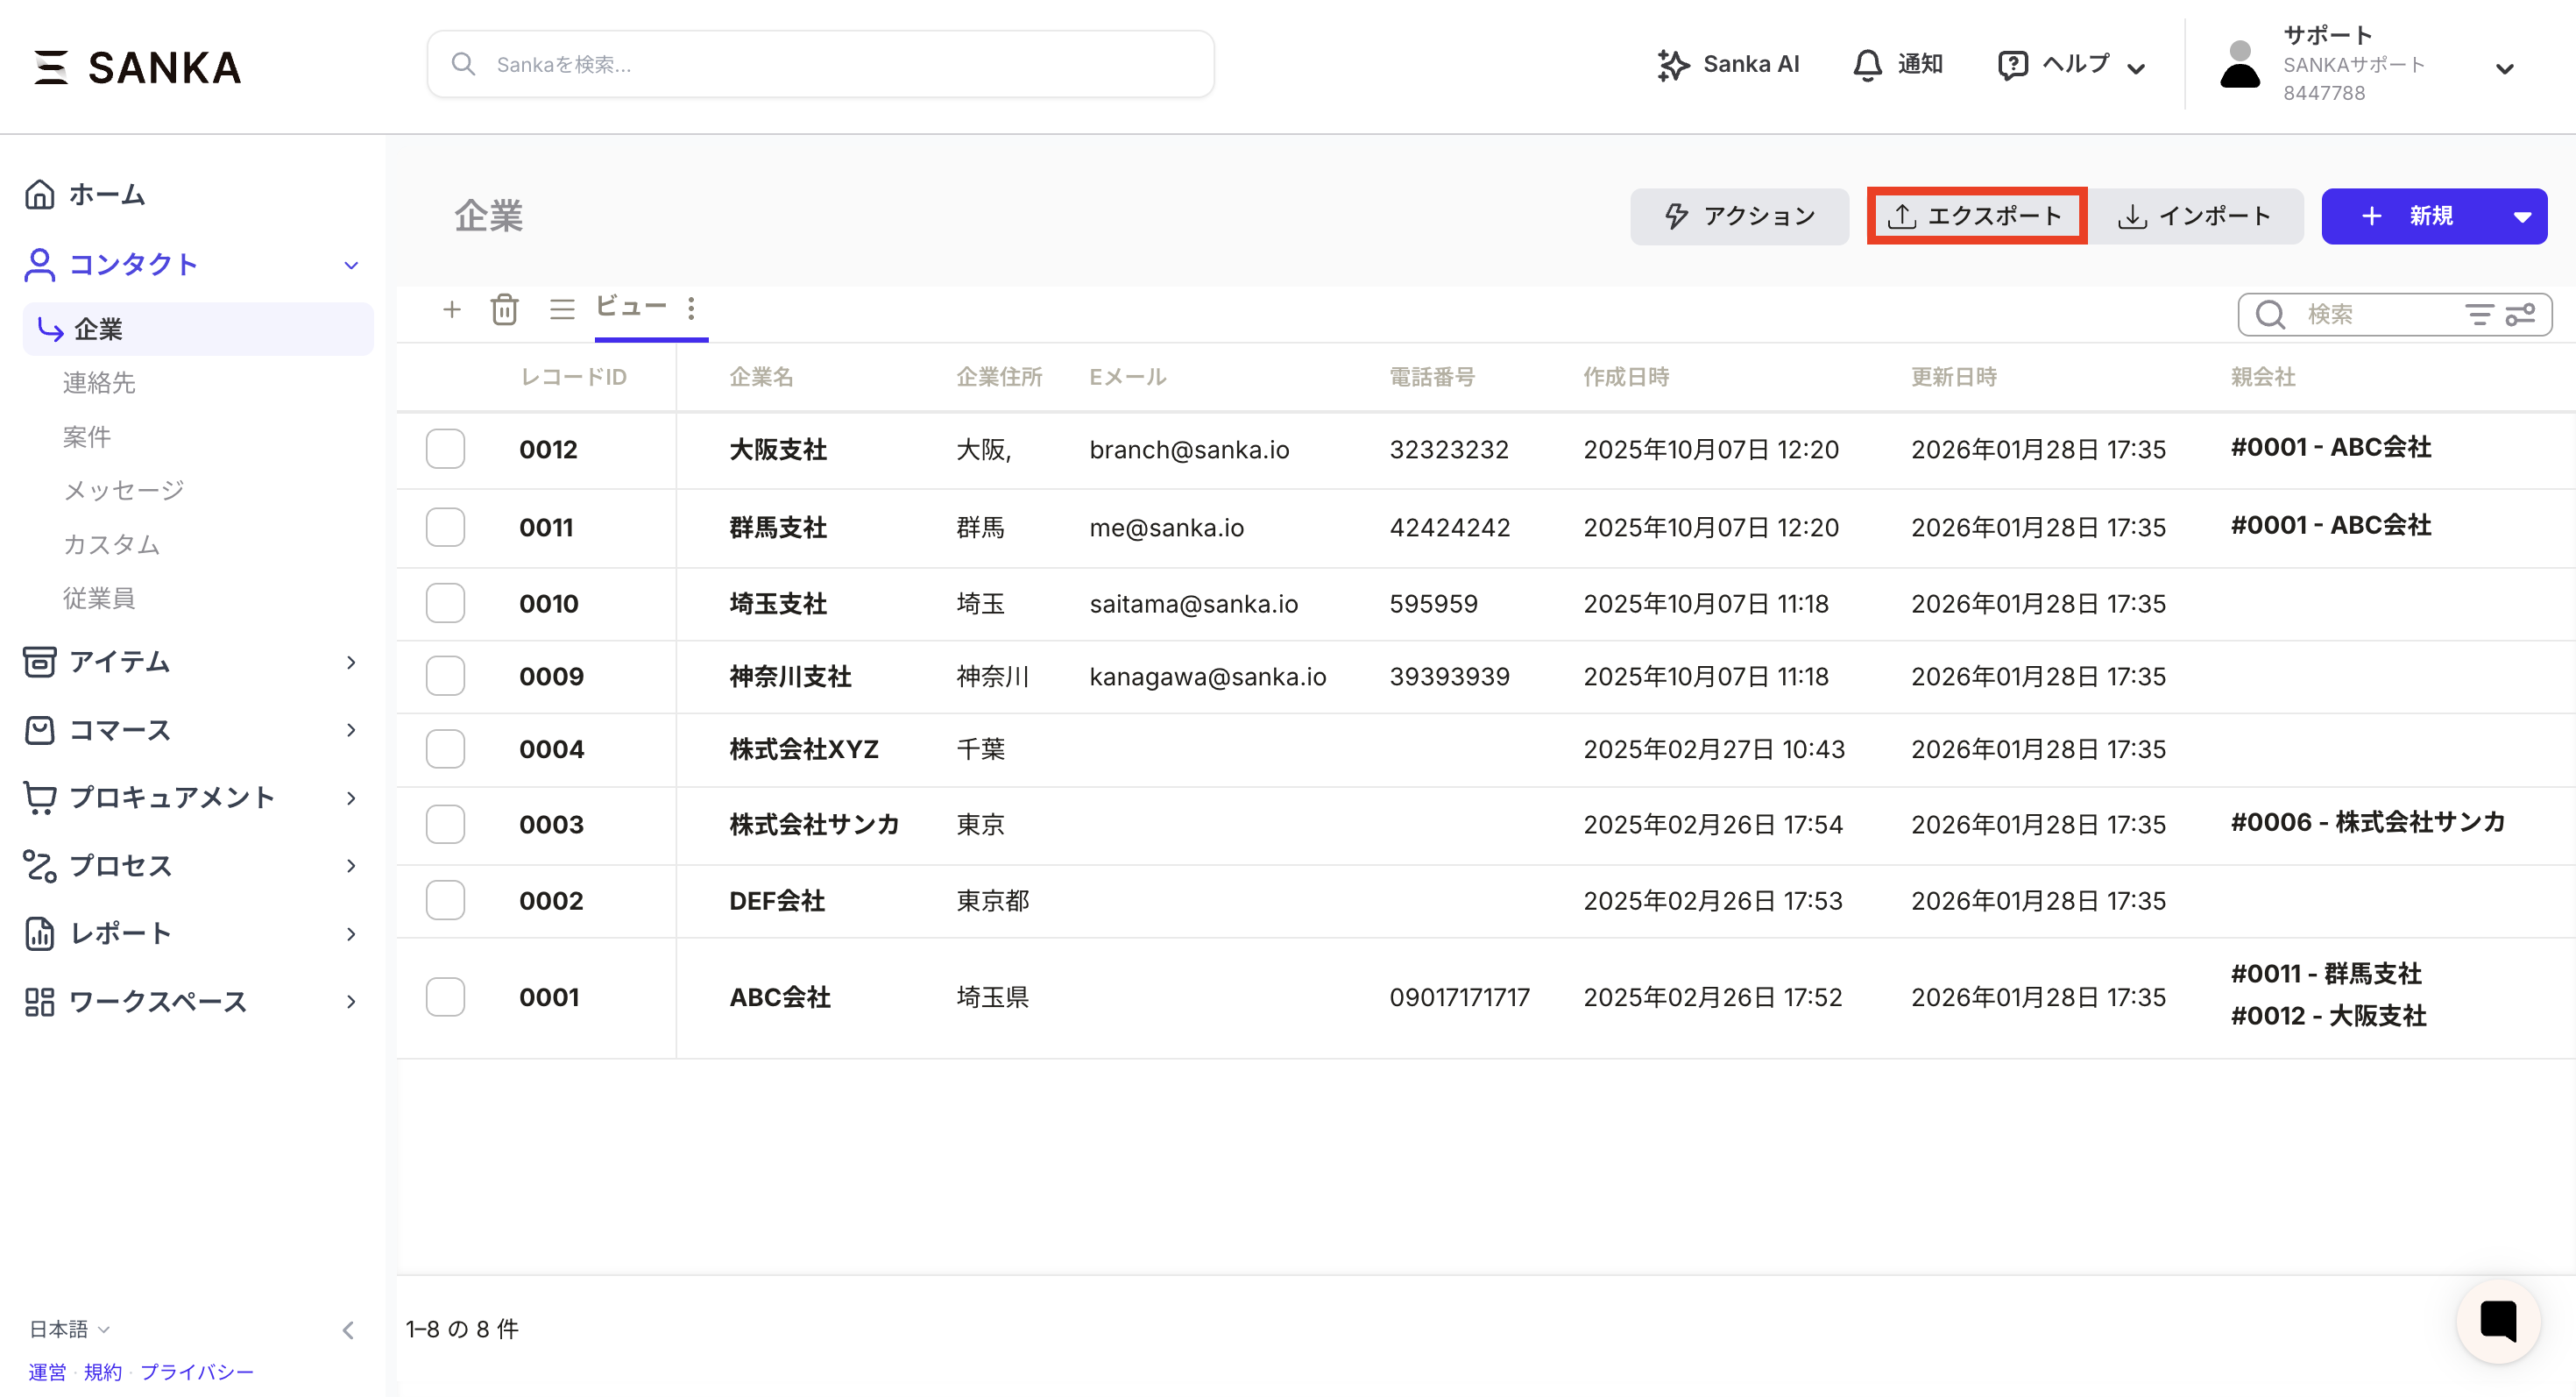
Open the object list you want to export from.
Use the current view or search filters to narrow the records if needed.
Click Export in the upper-right corner.
Choose CSV file as the export destination.
Confirm whether you are exporting selected records or all records that match the current conditions.
If you export selected records, check the selected count. If you export all matching records, confirm the current view and filters match the intended scope.
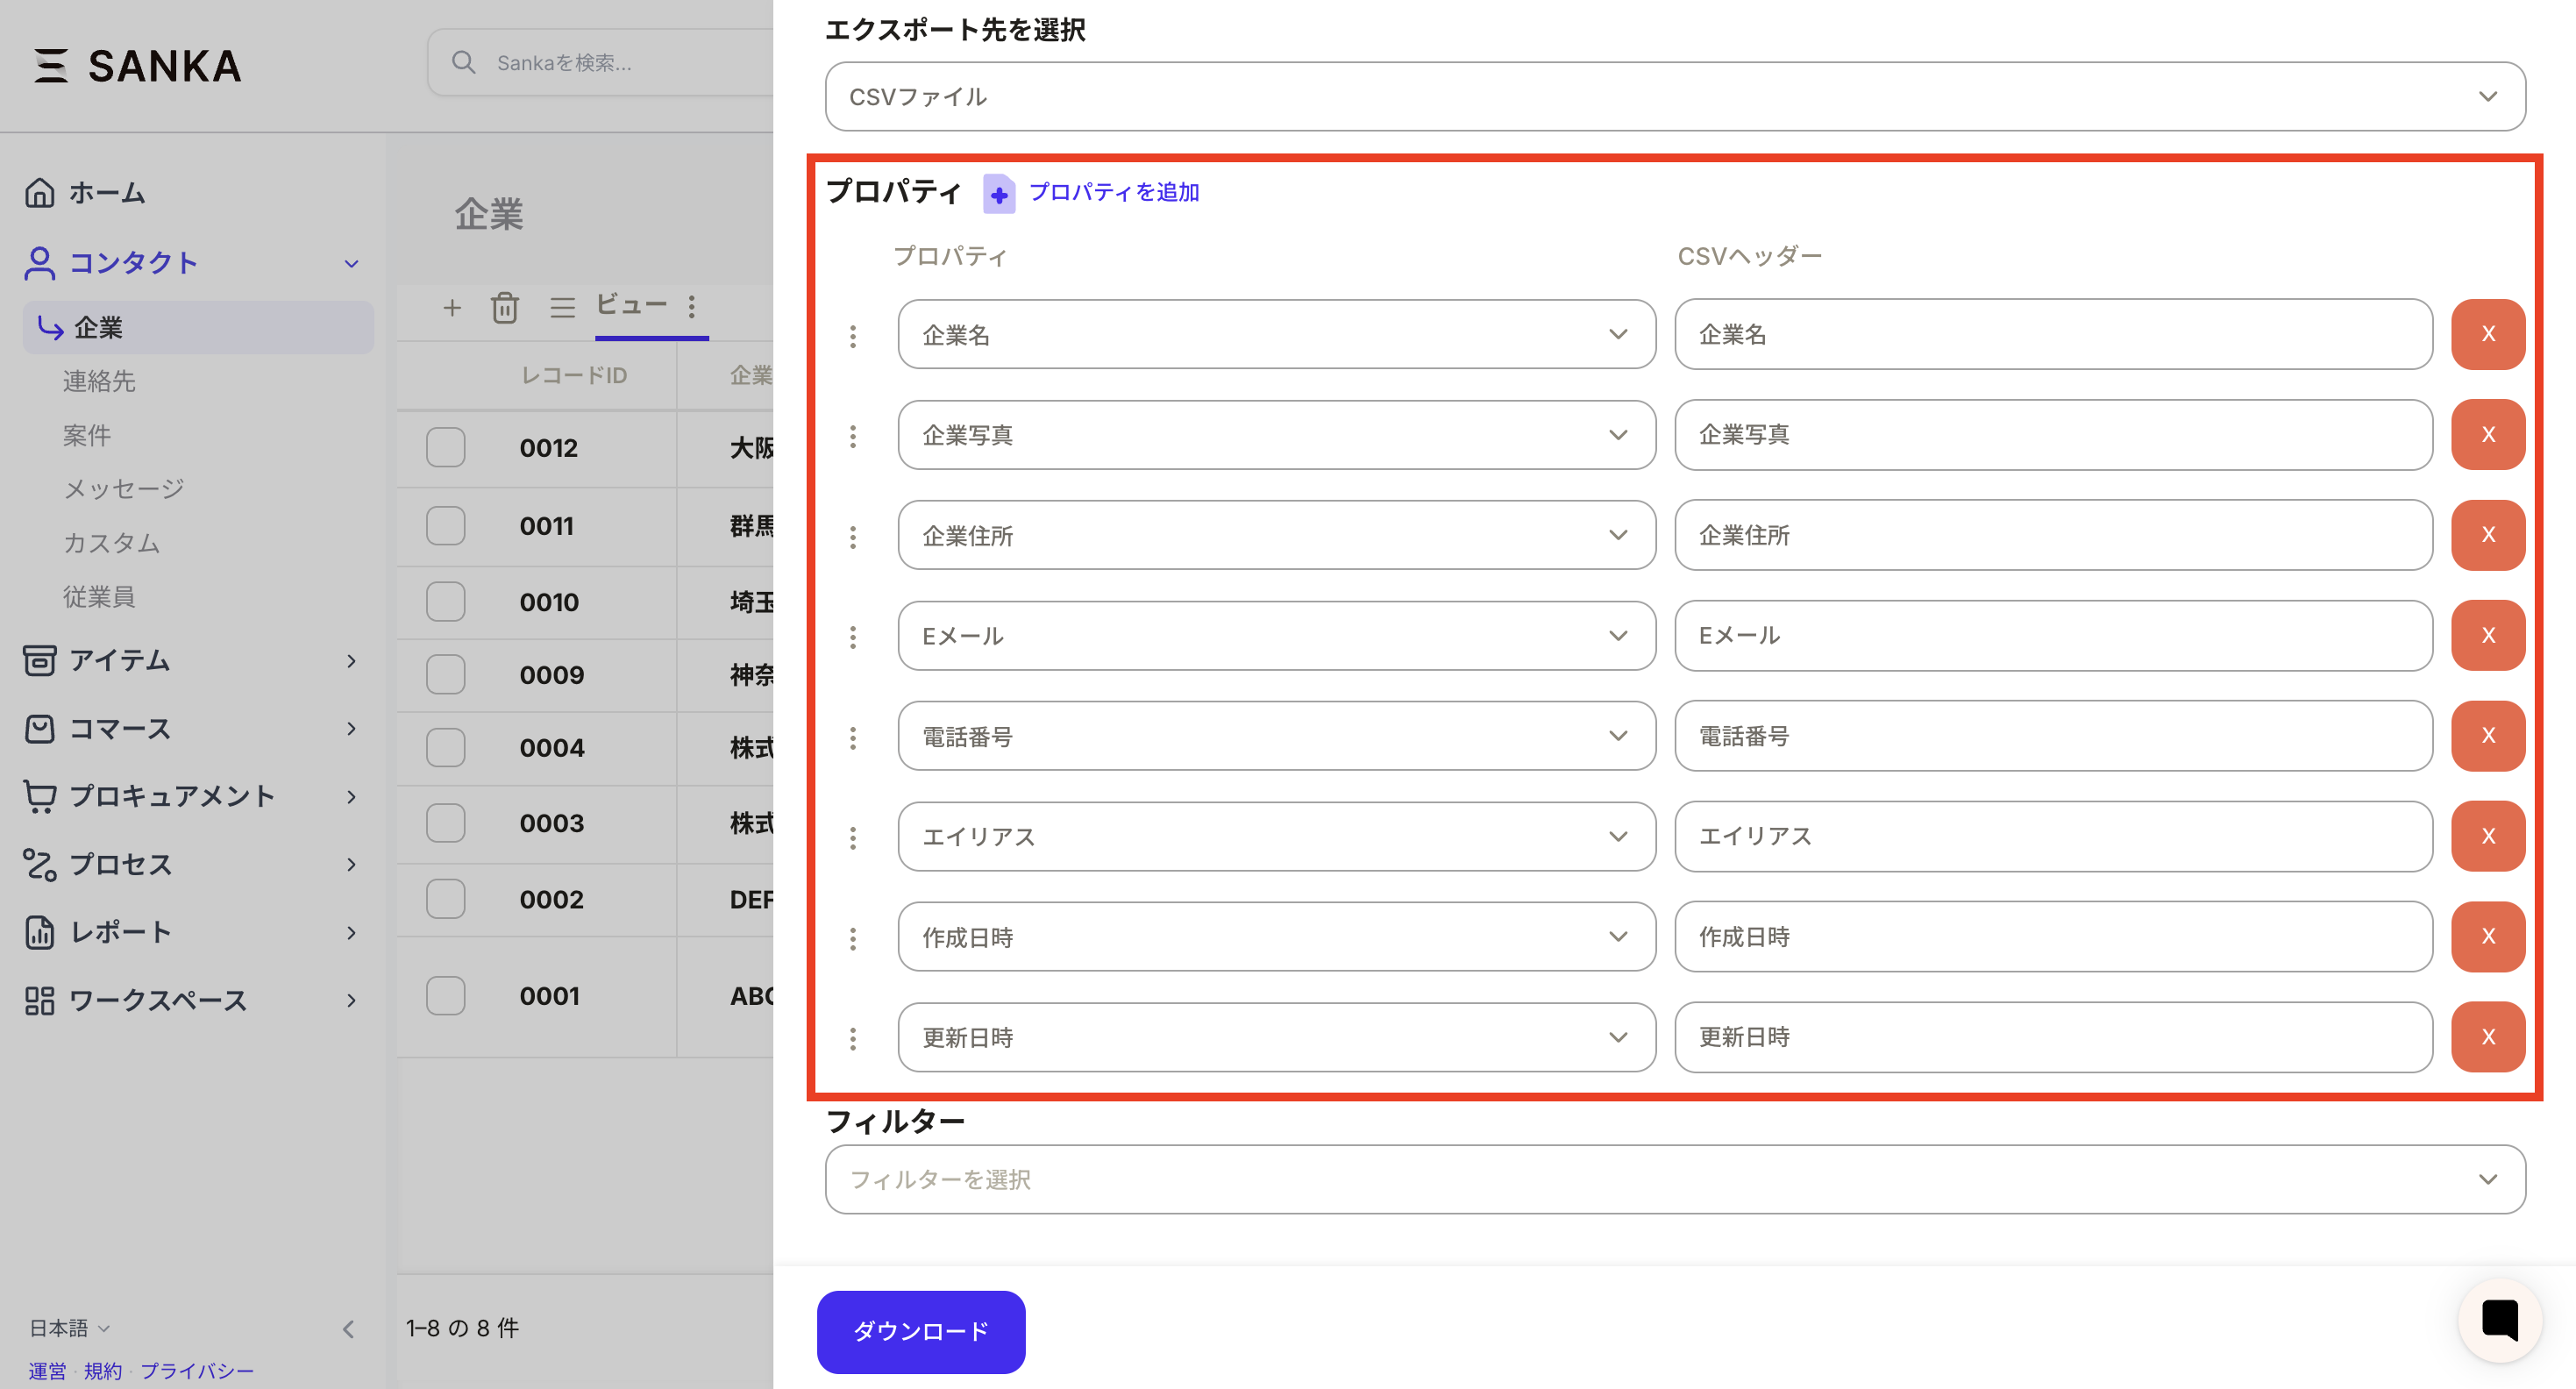
Choose output fields
Choose the properties to include in the CSV. Each output row pairs a CSV header with a Sanka property.
CSV header: The column name in the exported file.
Property: The Sanka field used as the value source.
Static value: An optional fixed value added to every row.
If the file will later be used for CSV updates, include a stable identifier such as record ID, external ID, SKU, order number, or invoice number. Avoid relying only on names when duplicates or spelling differences are possible.
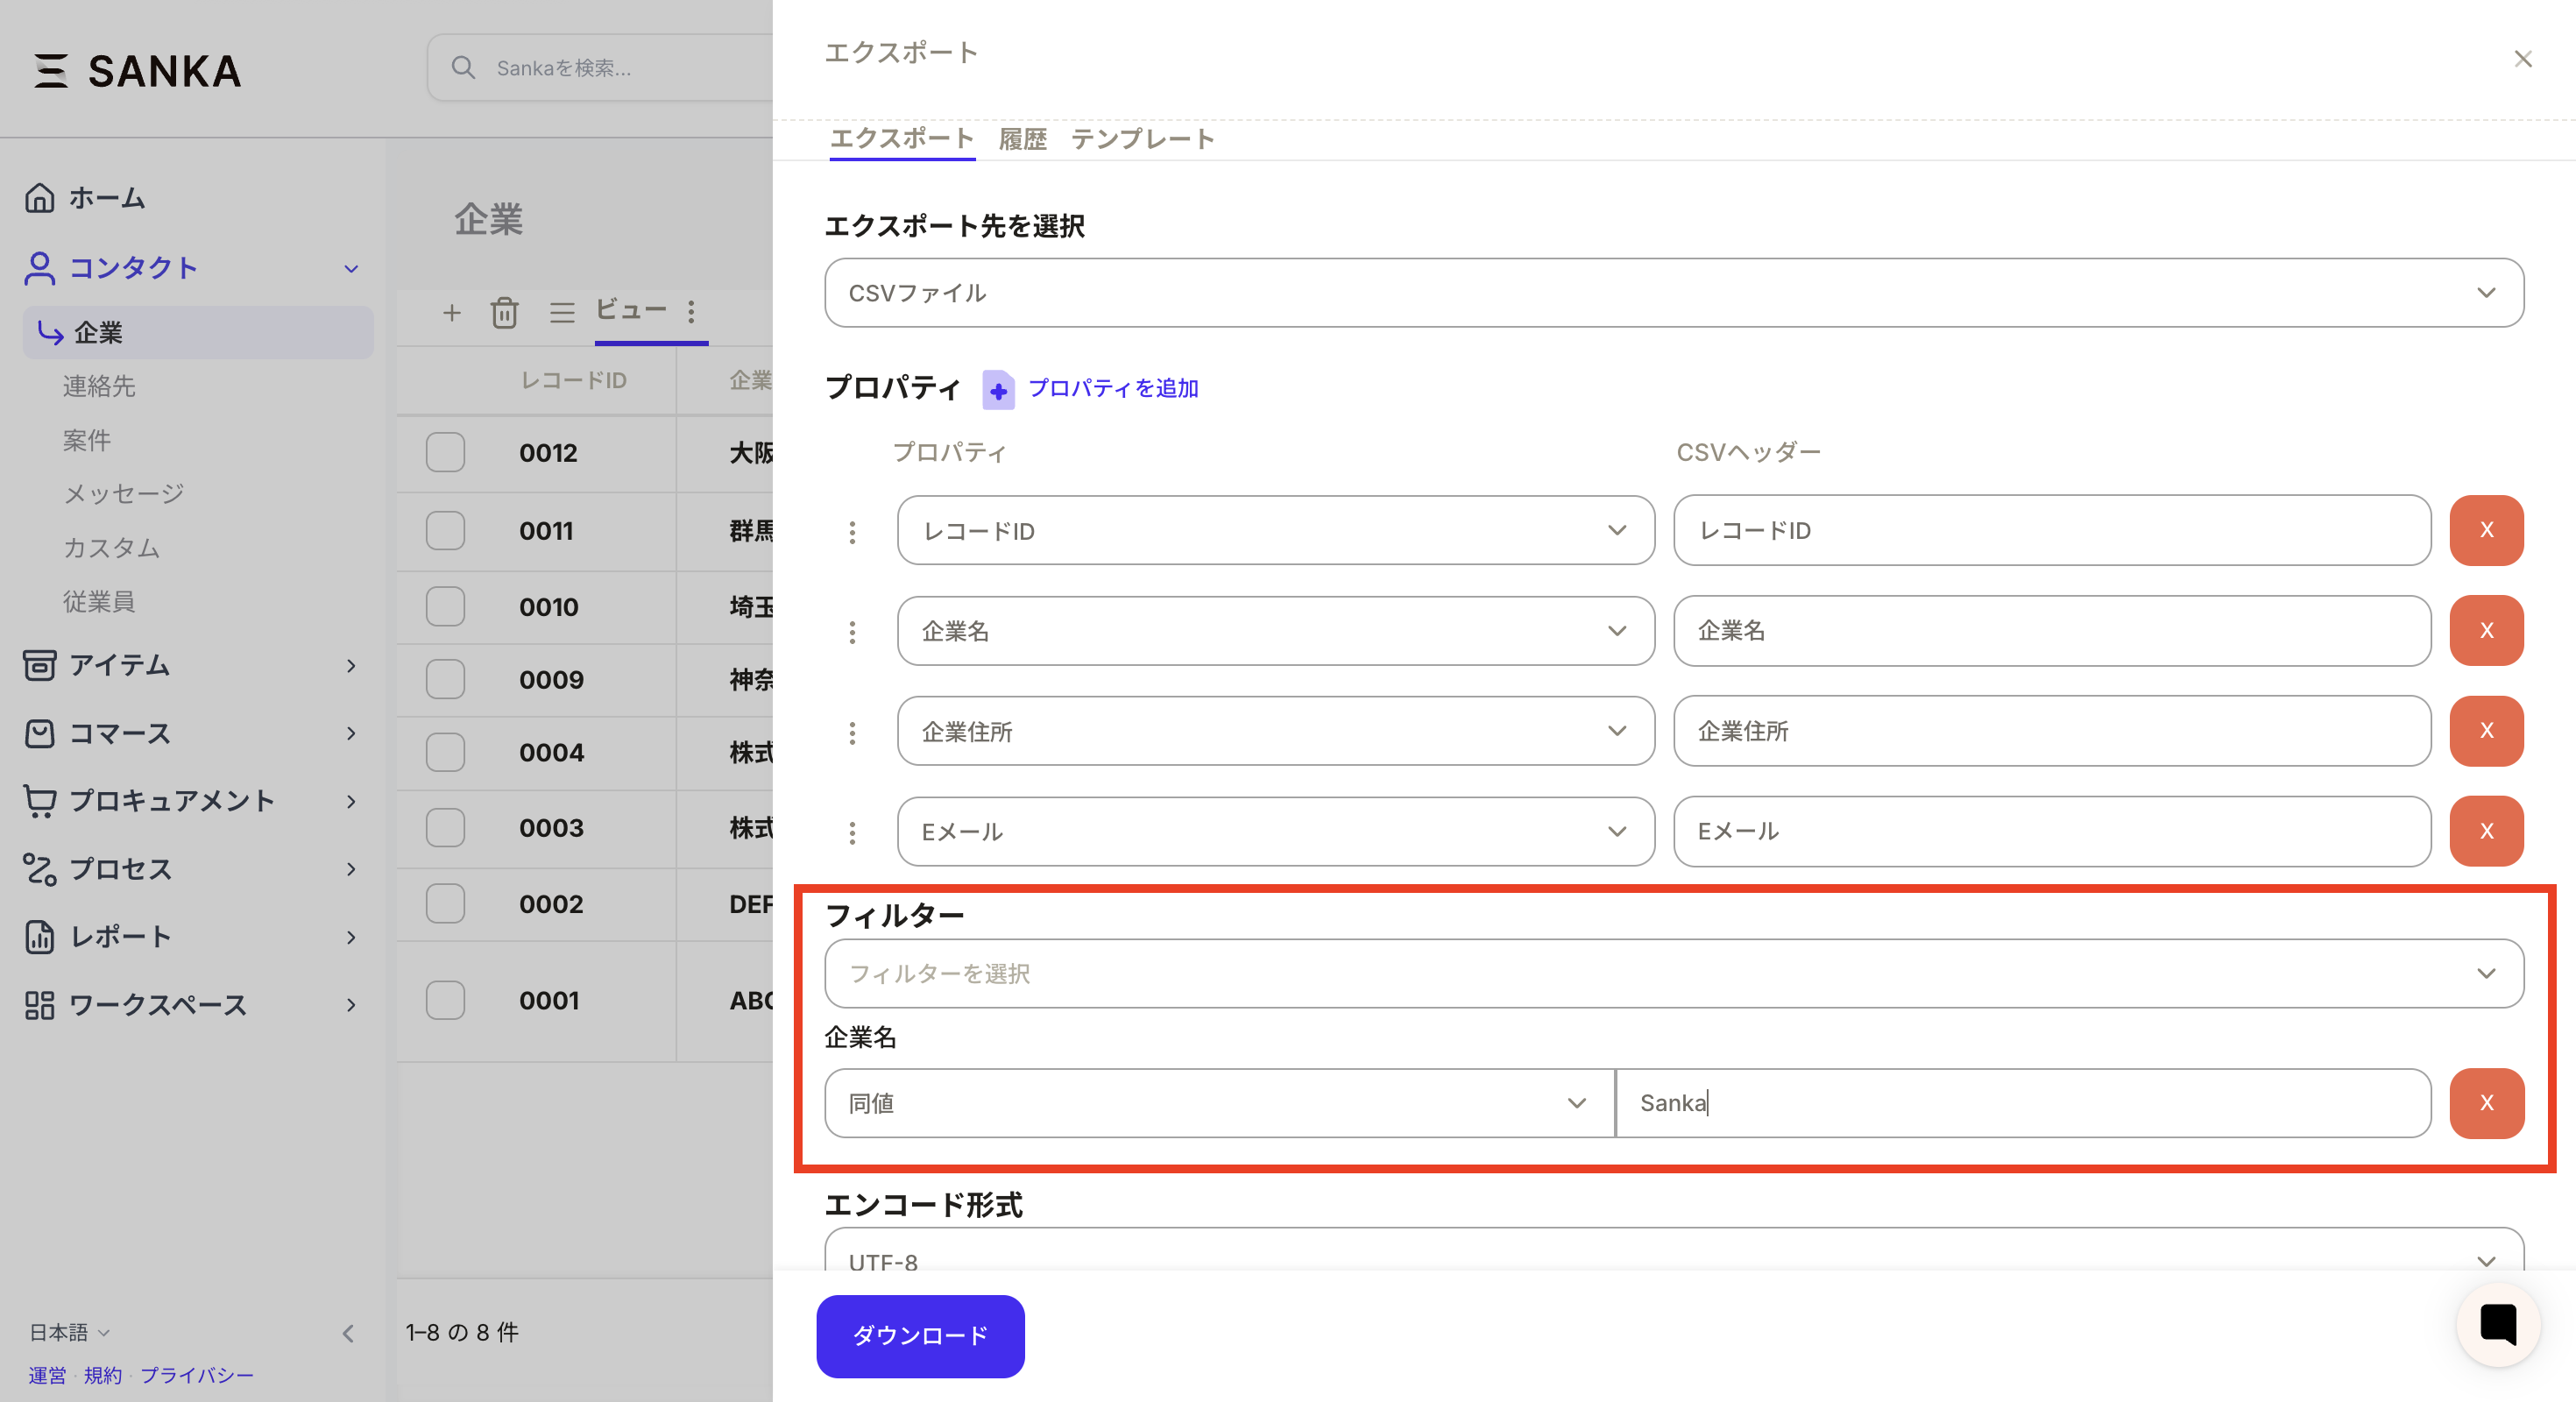
Set filters and encoding
Set filters, sort order, and encoding as needed.
Filters: Limit the export by status, owner, date, amount, customer, or another field.
Sort order: Make the file easier to review after download.
Encoding: Choose the format that matches how the file will be opened.
Use UTF-8 by default. Choose Shift-JIS when a Japanese business tool or older spreadsheet workflow requires it. If characters appear garbled, export again with the other encoding or import the file into the spreadsheet app as UTF-8.
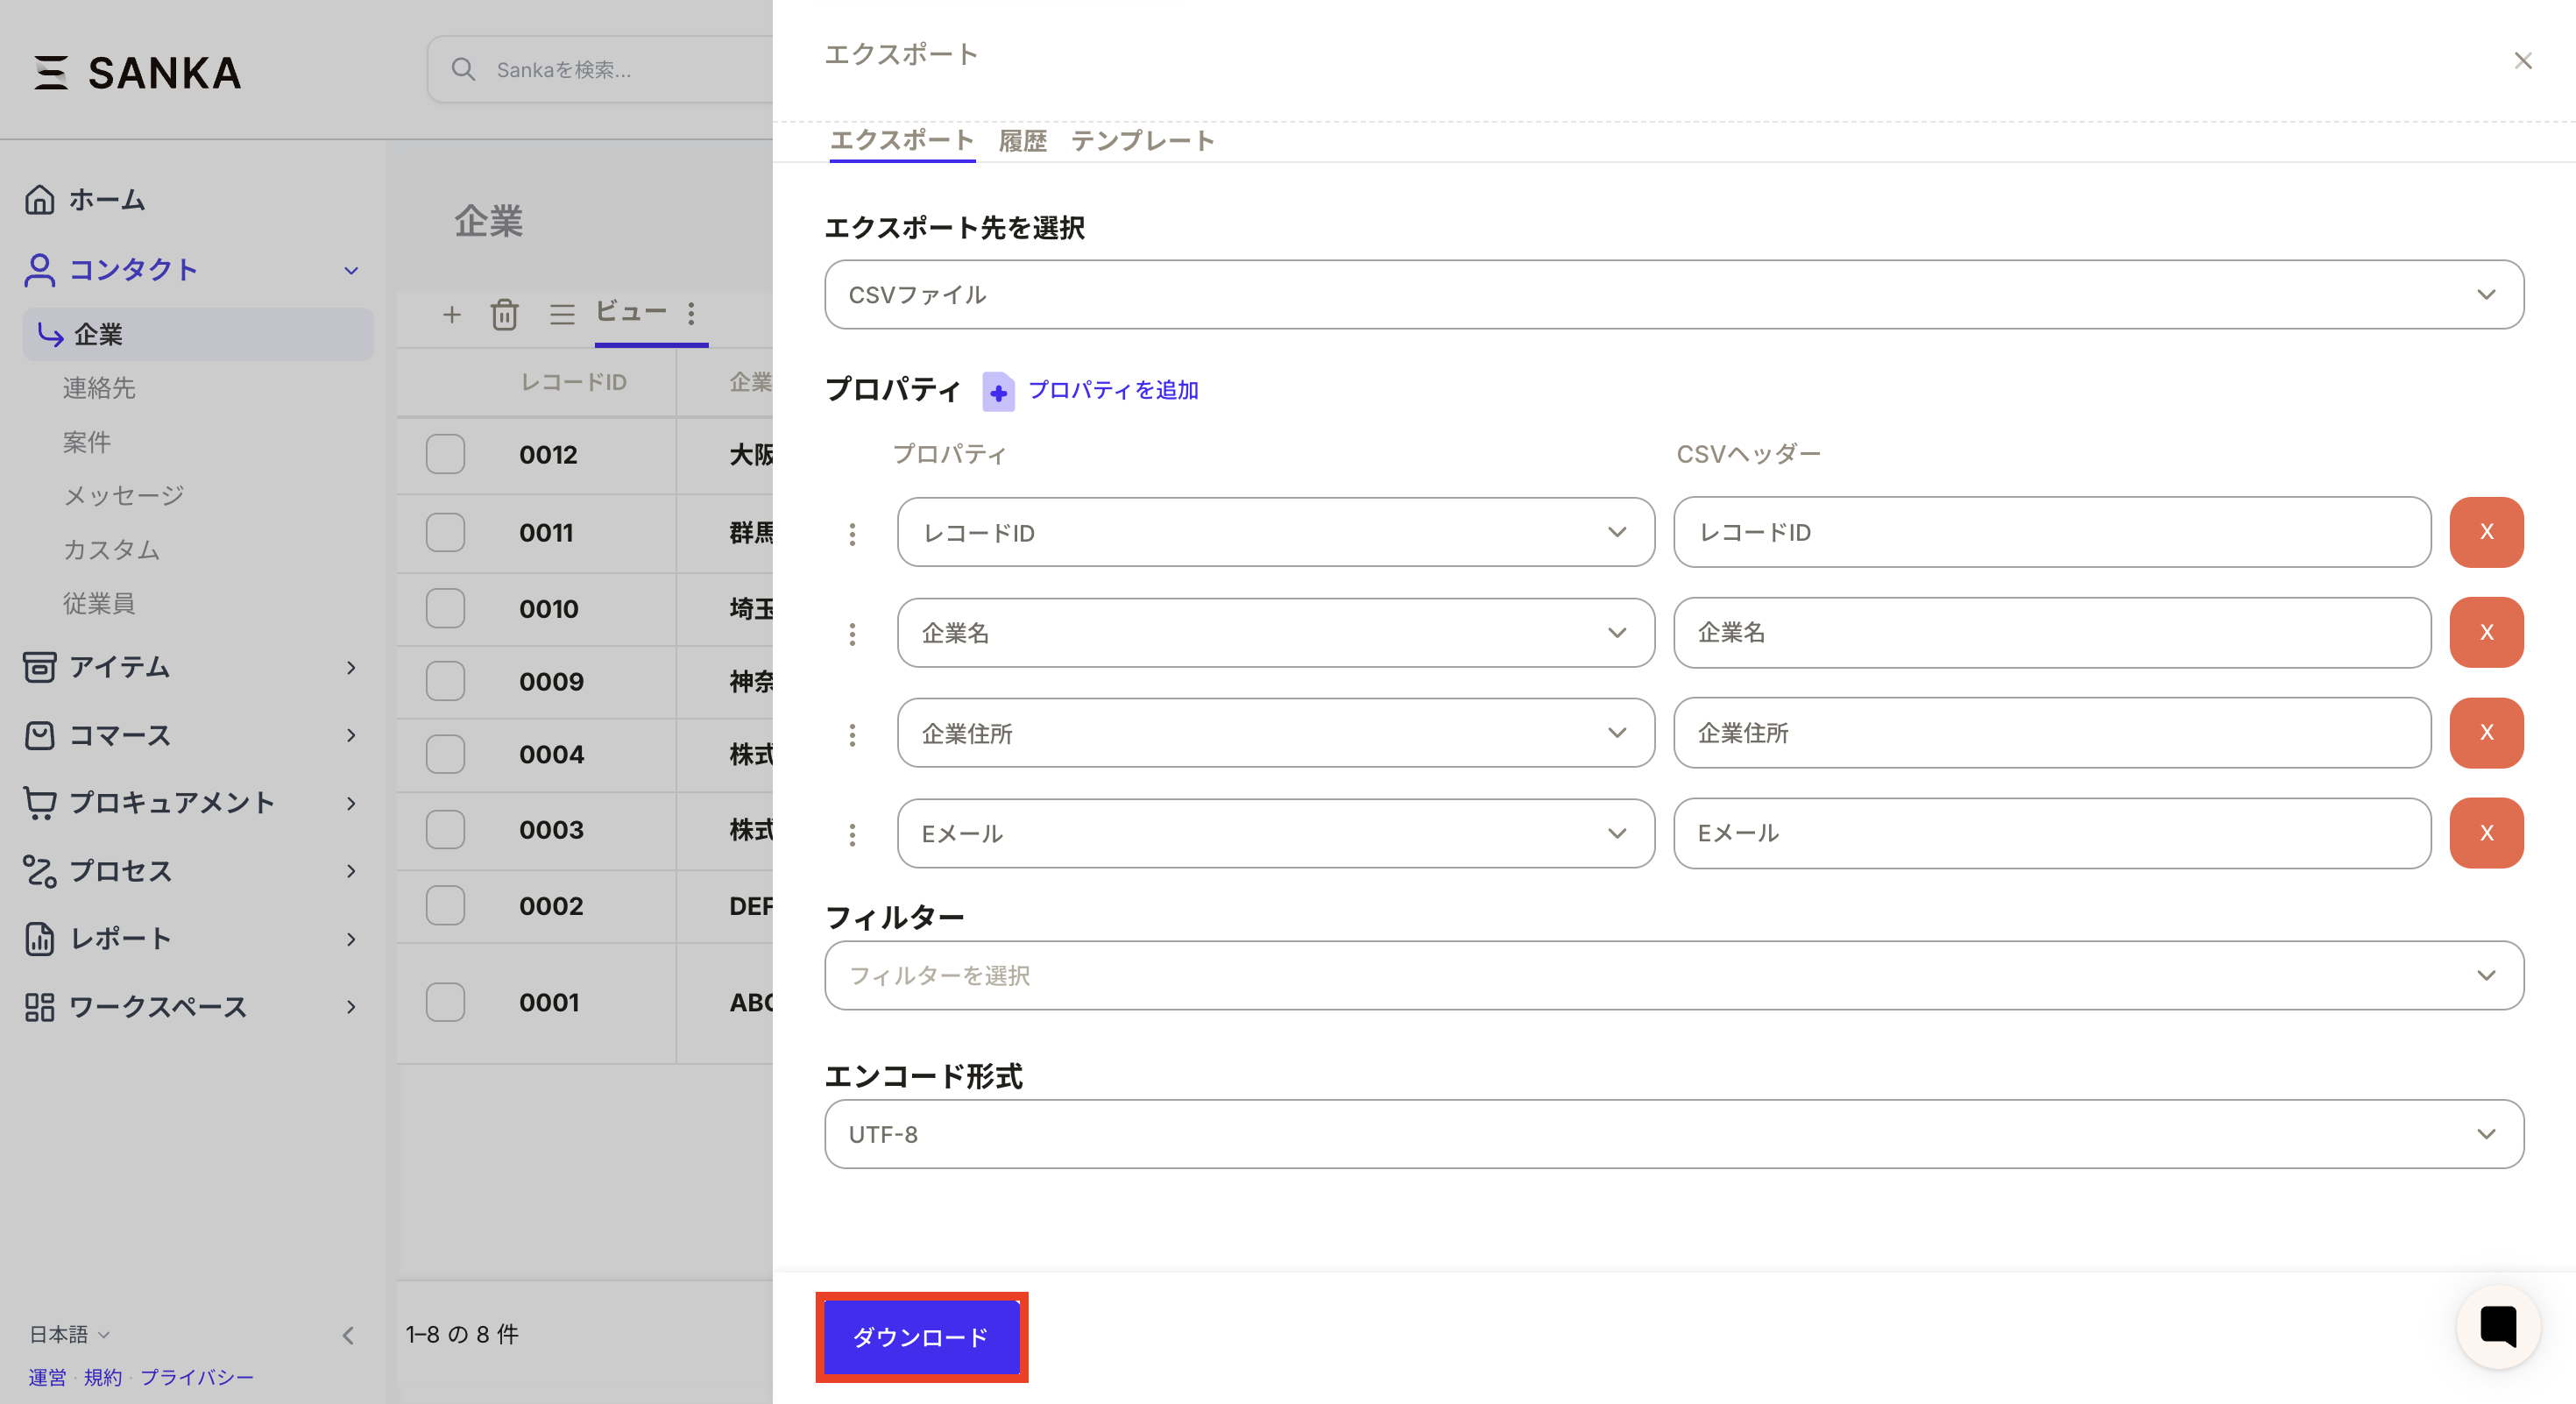
Downloads and history
Review the settings and click Download or the export action button.
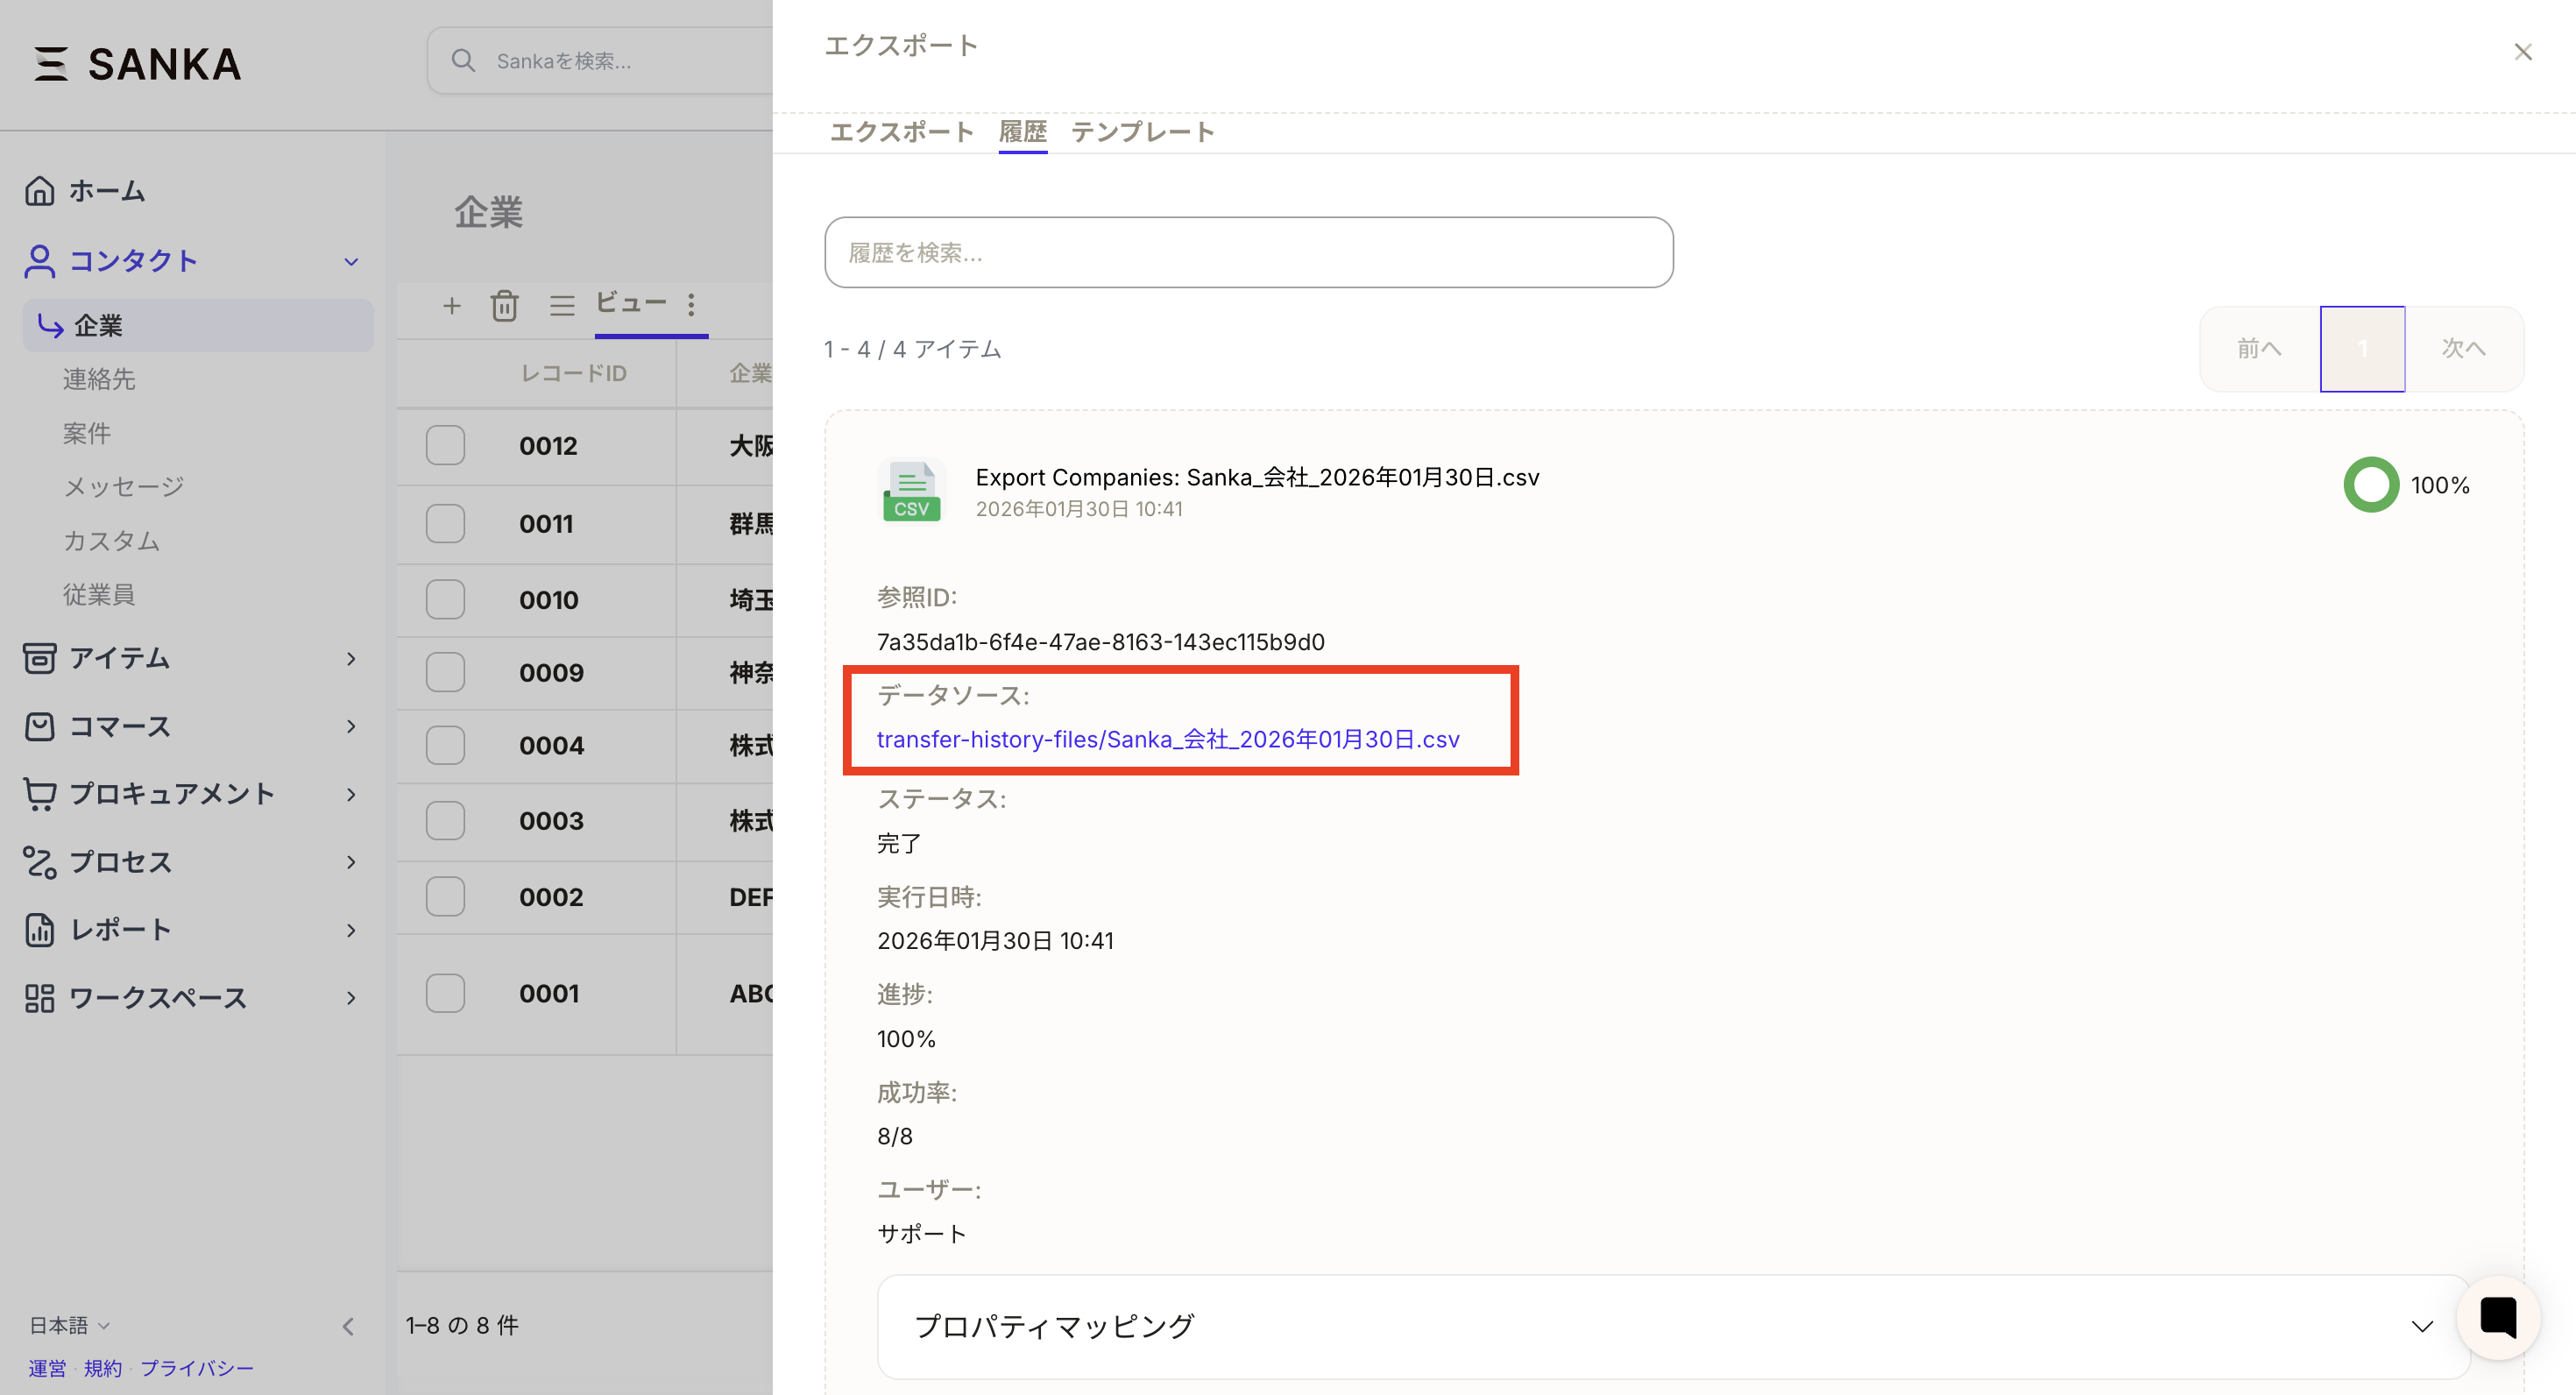
After the export starts, check the export history for status.
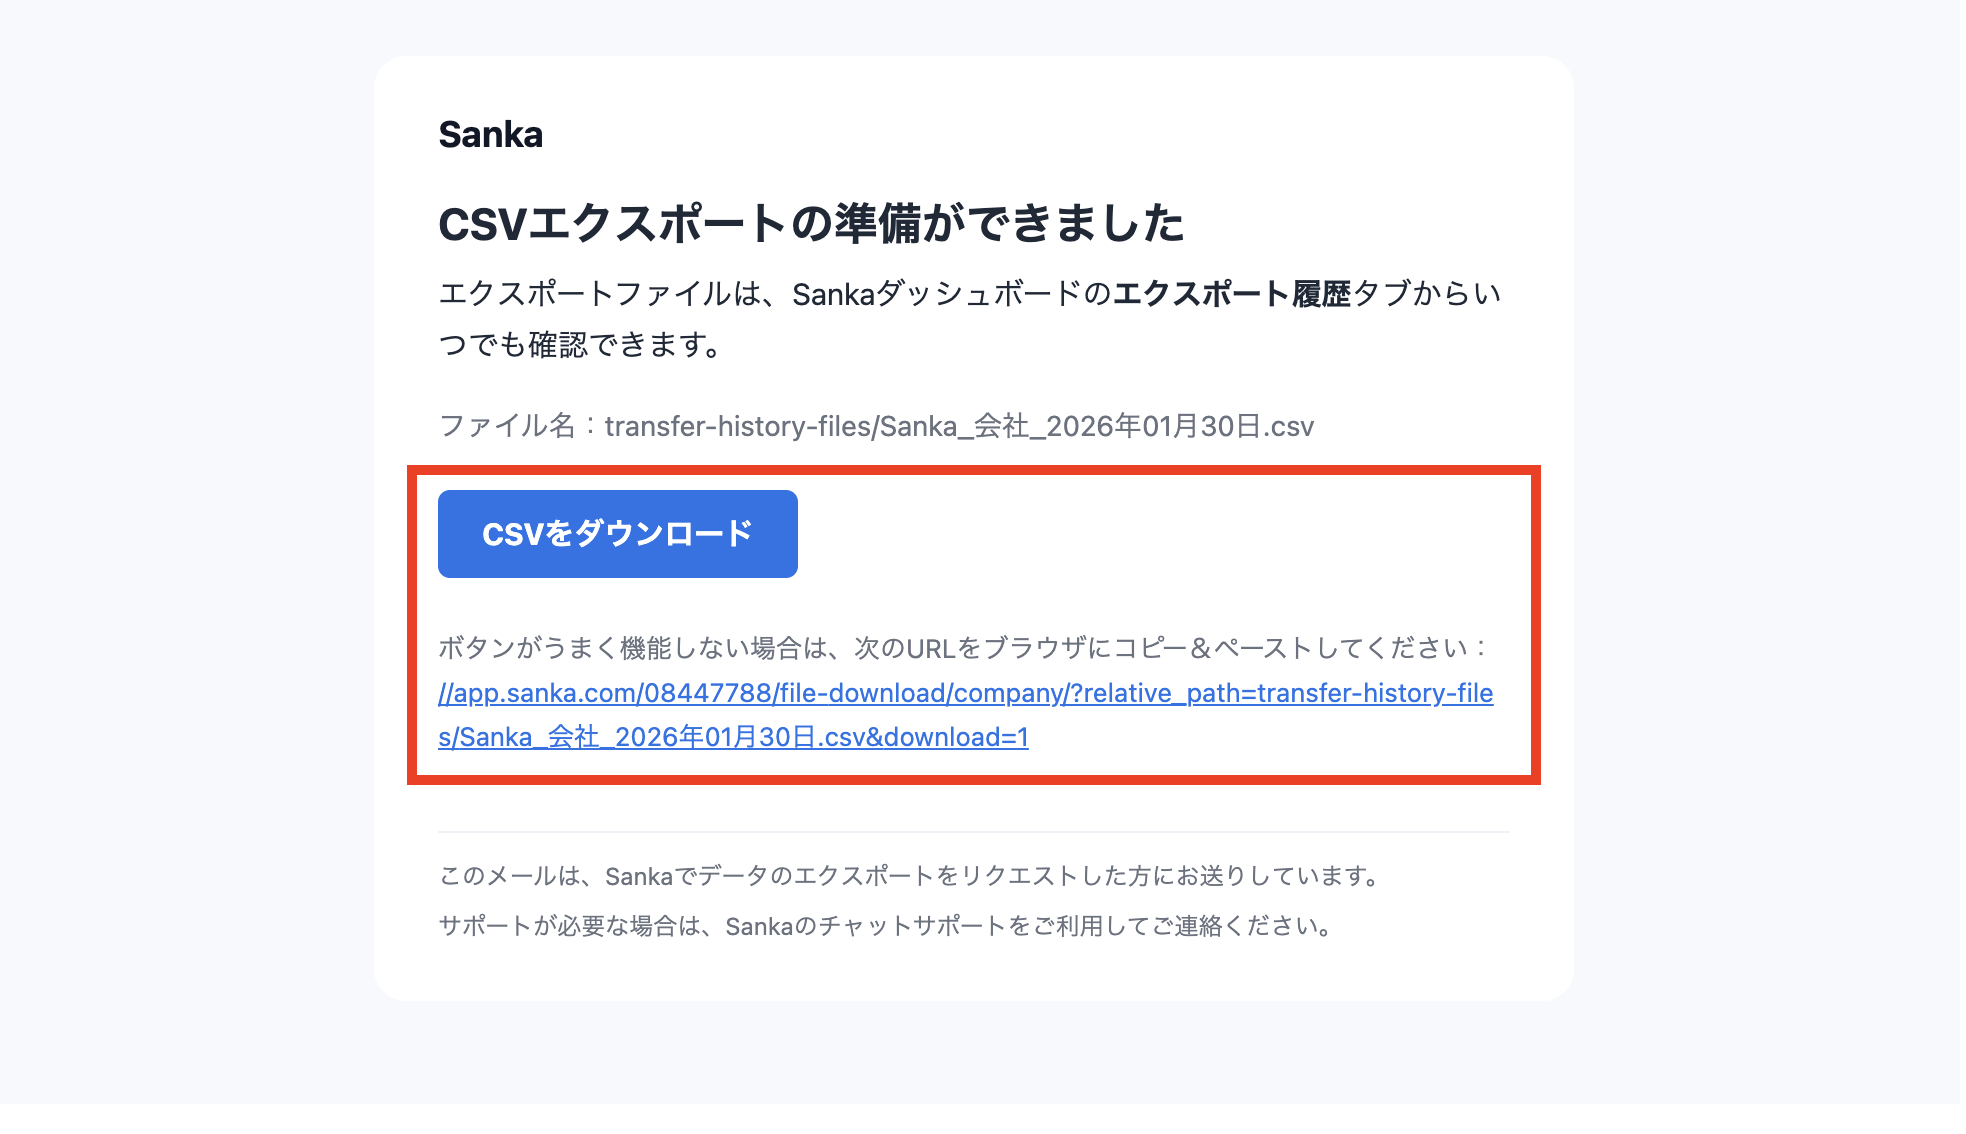
When it finishes, download the CSV from history or from the notification email.
Large exports may run in the background. If the file is not ready immediately, check status, progress, and failure details in export history before running the same export again.
Use templates
When you export the same fields and filters repeatedly, save them as an export template. Templates reduce missing columns for monthly reporting, accounting handoff, inventory review, or CSV update backup files.
Troubleshooting
Required columns are missing
Check the selected properties on the export screen. If you used a saved template, confirm the template includes the latest properties.
No records appear in the CSV
Check the current view, filters, selected records, and view permission. The export may be following the current view or selected-record scope.
Text is garbled
Older spreadsheet tools may display UTF-8 CSV files incorrectly. Export again with Shift-JIS, or import the file into the spreadsheet app using UTF-8.
The download does not finish
Check export history for status, progress, and failure details. For large exports, wait until the job finishes or fails before running the same export again.
Approval is required
If export approval is enabled for the workspace, the file can be generated after the approver reviews it. Do not split filters or fields just to bypass approval for sensitive data.
 If you export selected records, check the selected count. If you export all matching records, confirm the current view and filters match the intended scope.
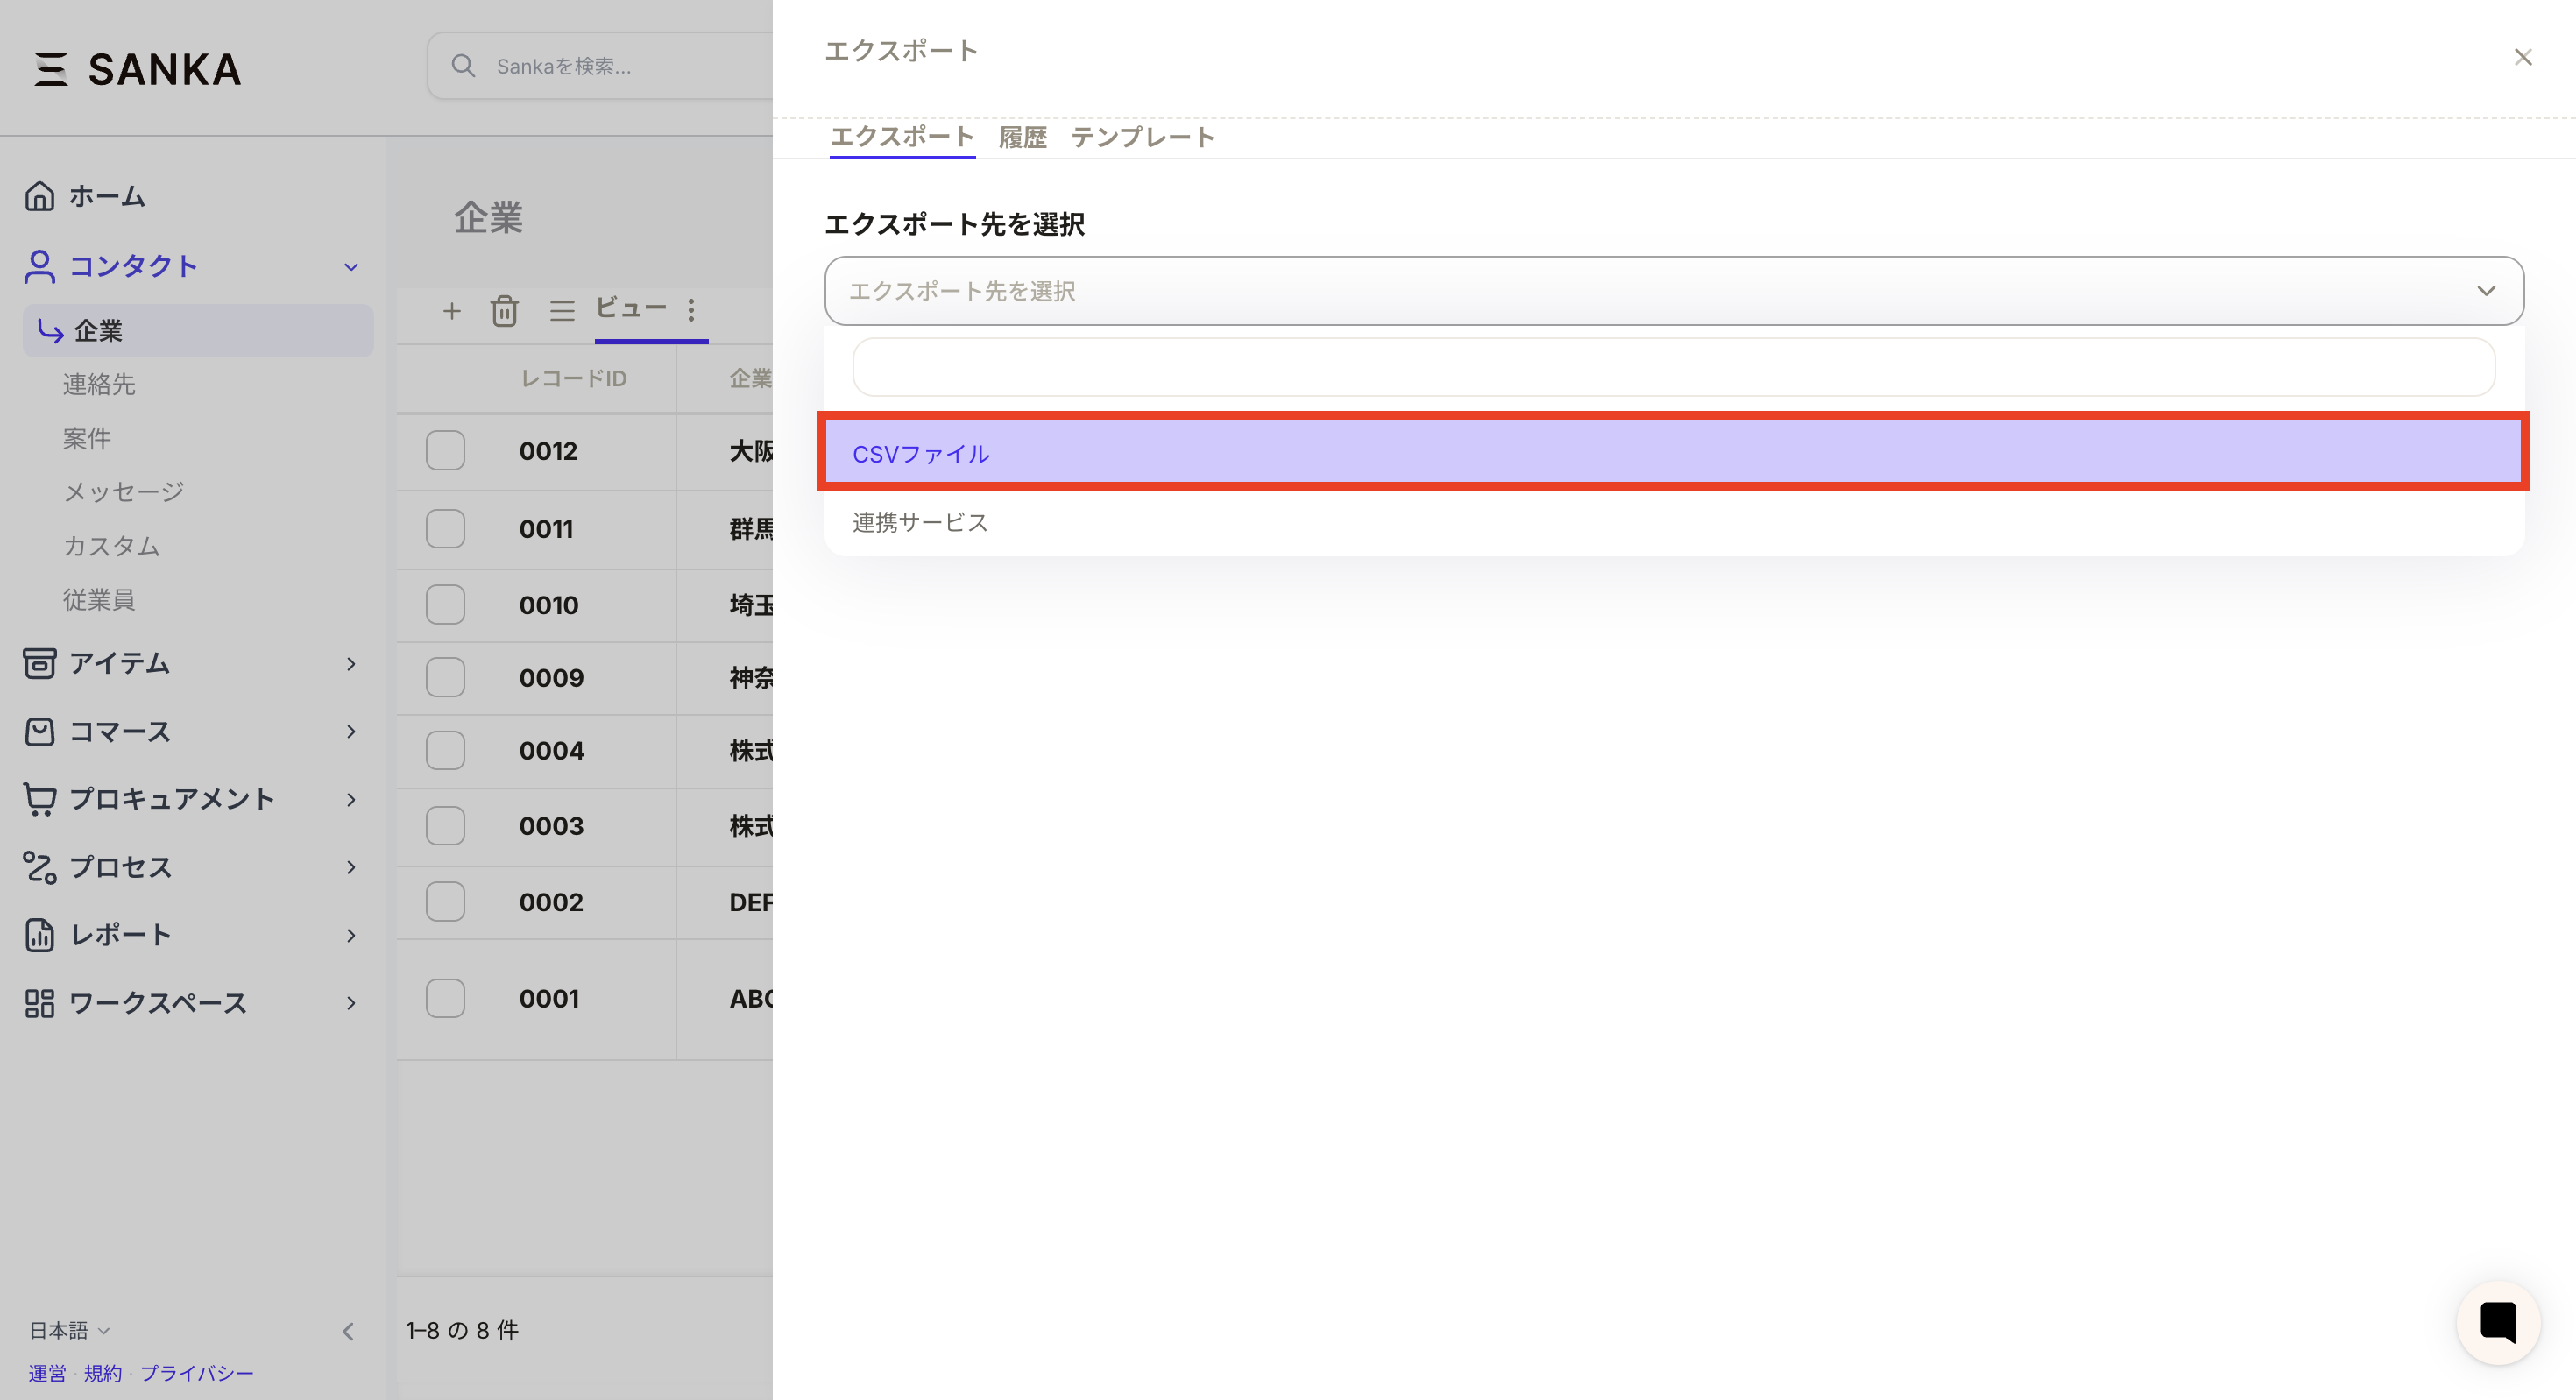
 Use UTF-8 by default. Choose Shift-JIS when a Japanese business tool or older spreadsheet workflow requires it. If characters appear garbled, export again with the other encoding or import the file into the spreadsheet app as UTF-8.
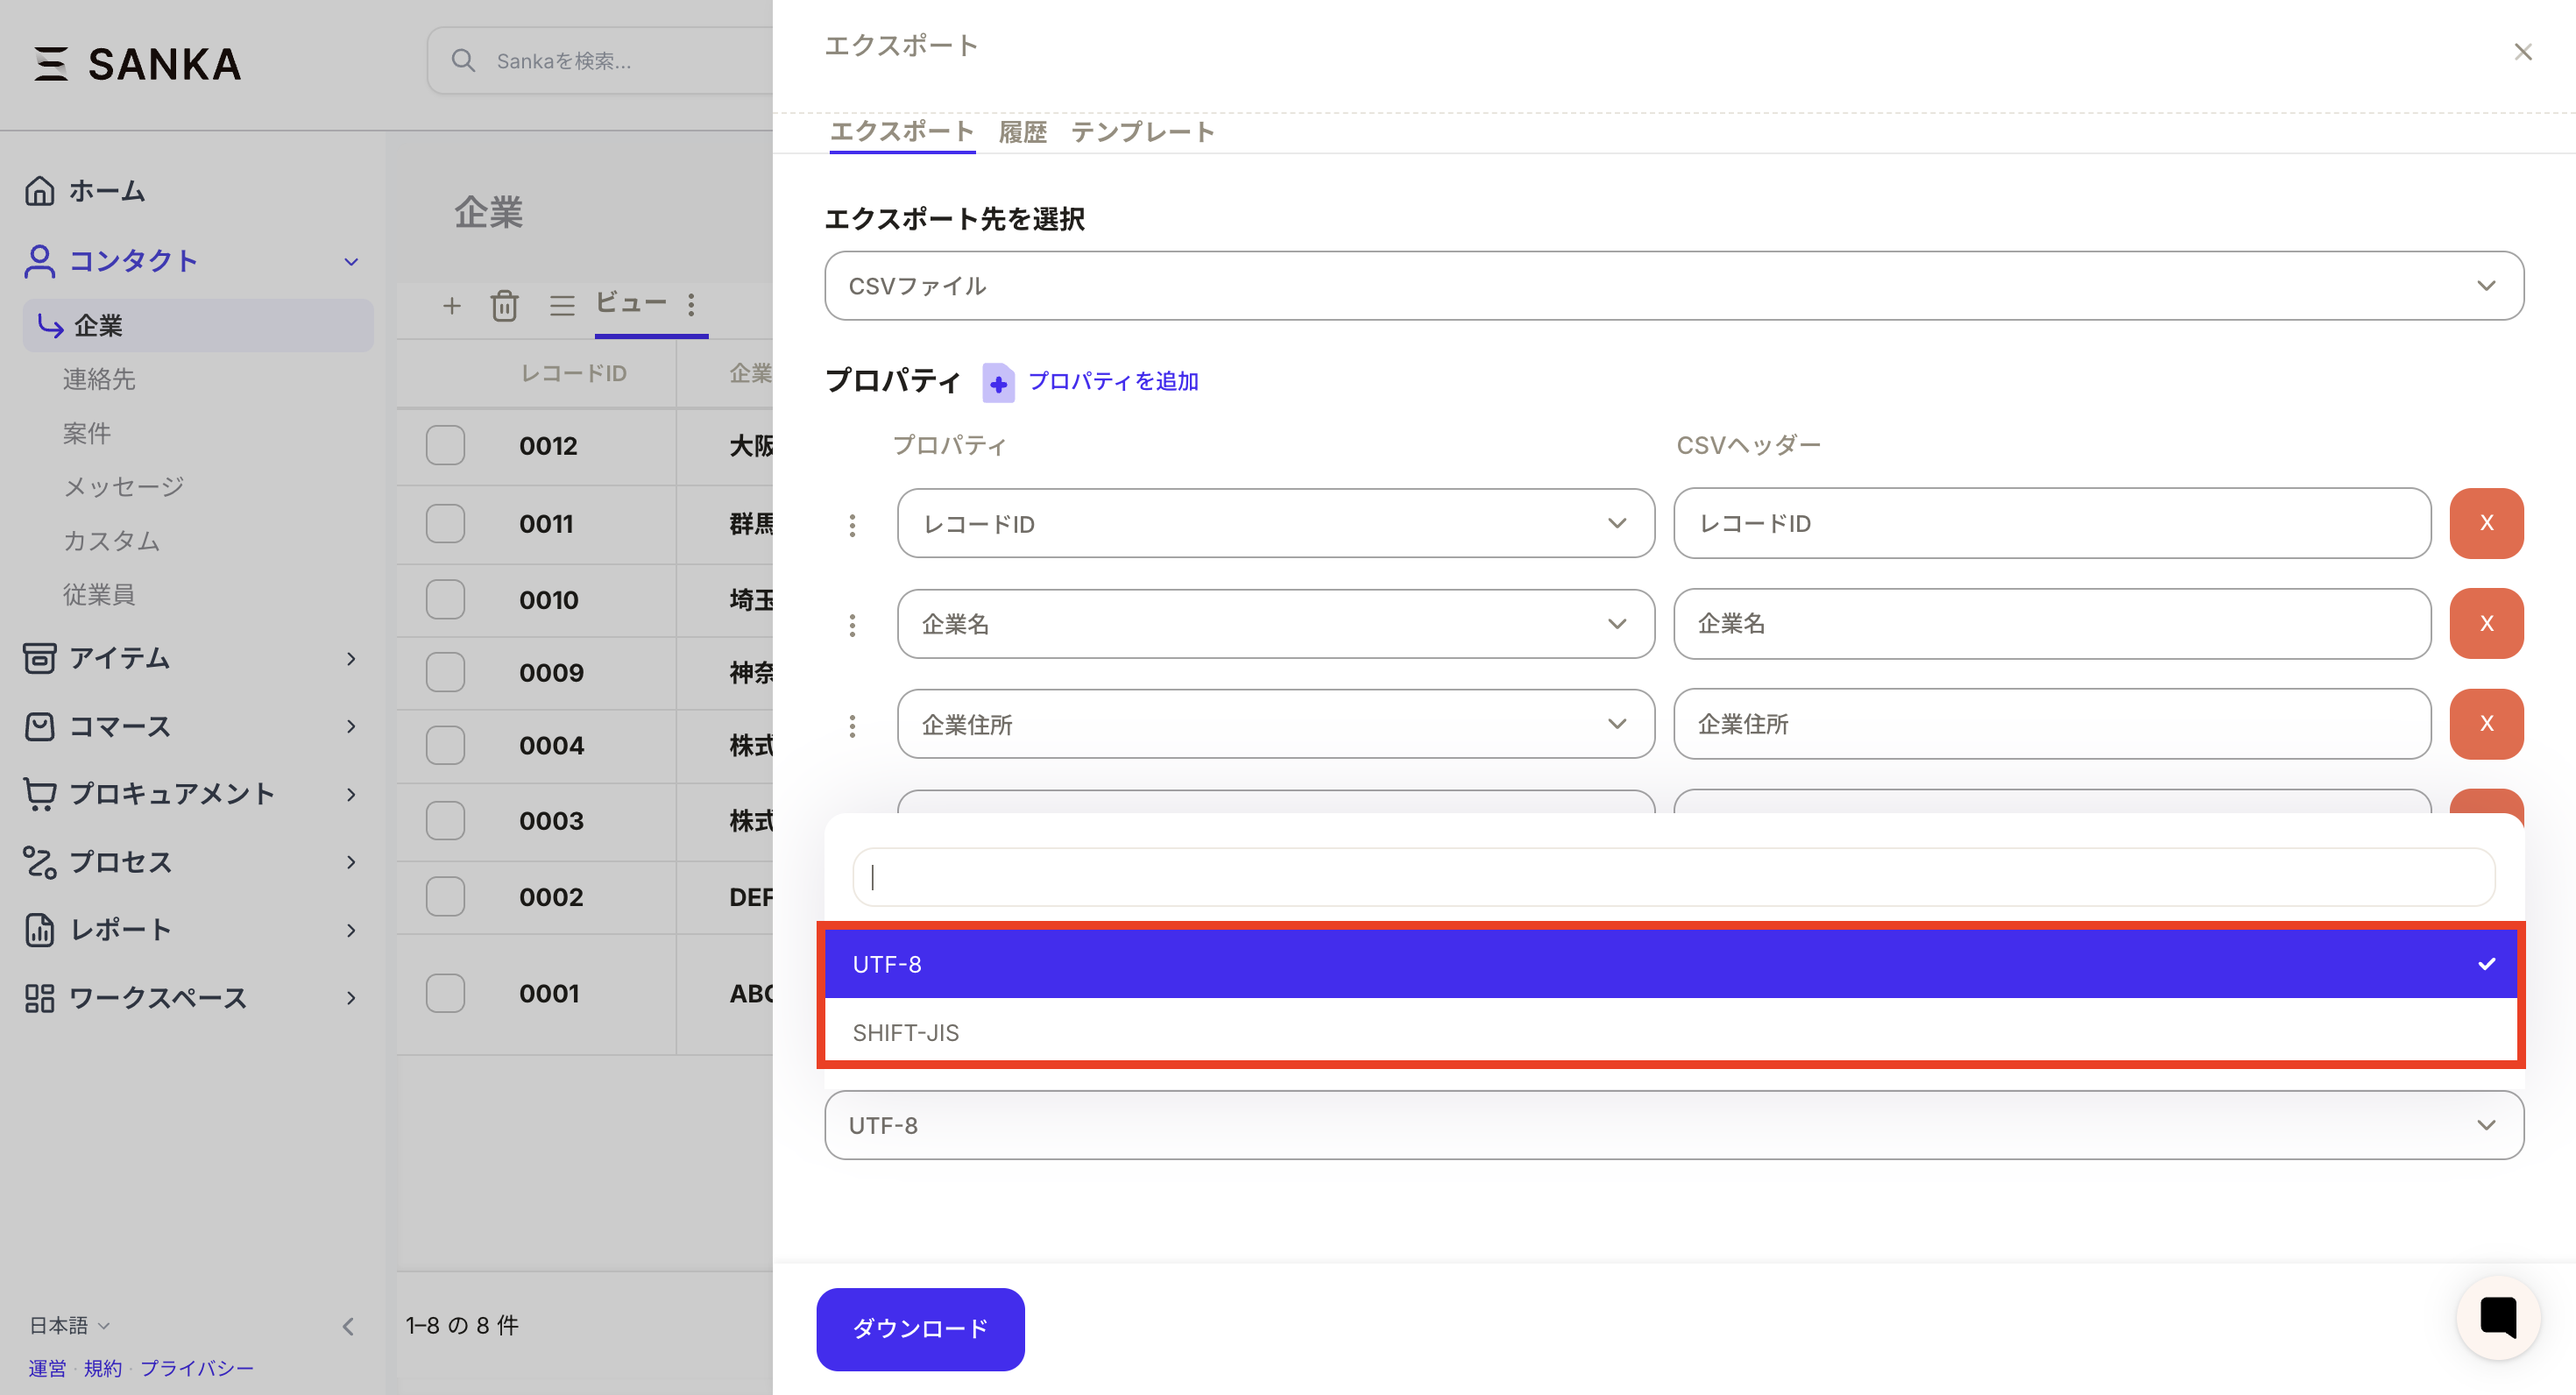
 Large exports may run in the background. If the file is not ready immediately, check status, progress, and failure details in export history before running the same export again.